
I have some great food that I'd like to share with you.
Saturday, October 30, 2010
Ginger - A Spice of Many Talents
Ginger is a great herb in so many ways. It does more than just give great flavor to your foods.
Ginger can be used in many ways.
You can buy a ginger root and grate it or chop it.
You can buy dried ginger that is ground.
You can also buy crystallized ginger.
Ginger has preserving properties. If you have ever made gingerbread cookies, you will notice that they keep and taste good for a really long time.
Ginger is also good for your health.
It will help nausea. It also helps your body digest fatty foods.
It also helps get rid of heartburn and the pain of arthritis.
It can also be good for your blood and ultimately your heart- it helps in the same way aspirin does.
So, the next time you add ginger to your yummy stuff know that you are doing something good for yourself.
Monday, October 25, 2010
Skinning That Chicken
Skinning chicken can be a hard thing to accomplish.
Some people hate skin, while others won't go without.
But, it is healthier to eat chicken without the skin. All the fat is right underneath the skin.
Skinning chicken is pretty simple.
A lot of people talk about skinning it when it is partially frozen.
That is fine, but it is awfully cold.
If you have hands that are overly sensitive to the cold, you might want to try another method.
Here is what I do:
Have a few napkins or paper towels handy.
Get your poultry cut how you want.
Grab a paper towel in your hand and use that to skin the chicken.
Now, on one side, loosen the skin away from the meat.
With the paper towel in your hand, grab a hold of the skin and pull it down and off of the bone.
By using the napkin or paper towel, your hand will not get all slick from the chicken fat.
You will have a good grip and be able to pull it off.
When you just use your hands, your hands get really slippery and the skin just doesn't want to pull off the bone.
Works like a charm!
Sunday, October 24, 2010
Yummy Chocolate Chip Cookies
 Chocolate chip cookies are always good. And these are no ordinary chocolate chip cookies.
They are soft and seem to have more semi-sweet chocolate flavor than in most cookies.
Preheat your oven to 375 degrees Fahrenheit.
Grease, or line with parchment, some cookie sheets.
Ingredients:
3/4 cup(1-1/2 sticks) unsalted butter, softened
2/3 cup packed brown sugar
2/3 cup sugar
2 Tablespoons light corn syrup
1 Tablespoon cider or white vinegar
2 eggs
1 Tablespoon vanilla extract
1/2 teaspoon salt
1/2 teaspoon baking powder
1/4 teaspoon baking soda
2-1/4 cups flour
3 cups semi-sweet chocolate chips
In a large bowl, cream together the butter, sugars, corn syrup, and vinegar.
Beat in the eggs.
Mix in the vanilla extract, salt, baking powder, and baking soda.
Stir in the flour, than the chocolate chips.
With a tablespoon or medium cookie scoop, drop cookies on the cookie sheets.
Bake for 10 minutes, just til set. The centers may look soft.
Take them out of the oven and remove to racks to cool.
Makes about 4 dozen cookies.
Saturday, October 23, 2010
Creole Rub/Seasoning
 Creole rub seasoning is great for using as a rub for meat and poultry. It also is great to add to recipes.
It isn't very spicy, but it does have a bit of warmth to it.
I use this in Tuna Creole. I also love to rub it on ribs or chicken before I put the meat on the grill.
Ingredients:
3 Tablespoons paprika
2 Tablespoons salt
1 Tablespoon garlic powder
1 Tablespoon ground black pepper
1 Tablespoon onion powder
1 Tablespoon cayenne pepper
1 Tablespoon dried oregano
1 Tablespoon dried thyme
Combine all the spices in a jar with a lid.
Screw on the lid tightly and shake to mix.
Will keep fresh for 6 months.
Makes about 3/4 cup.
Good tip- when you empty a spice jar, wash it out and save it for storing your homemade seasonings.
Thursday, October 21, 2010
Tuna Creole
 I love this stuff. Tuna Creole is a good simple meal that is equally easy on your pocketbook.
In the time it takes to cook the rice, you can have the creole done. Super quick!
Ingredients:
1/4 cup chopped mild green chili pepper
2 Tablespoons butter
2 Tablespoons flour
1/2 teaspoon sugar
1/2 teaspoon salt
1/8 teaspoon pepper
1/3 cup milk
1-3/4 to 2 cups chopped tomatoes, canned(15oz can) or fresh
1(6 oz) can tuna, drained
1 teaspoon creole seasoning
3 cups hot cooked rice, for serving
Melt the butter in a large saucepan.
Add the chopped pepper and cook until tender.
Stir in the flour, sugar, salt, and pepper.
Gradually add the milk, stirring constantly. Add the tomatoes and bring to a boil.
Continue to stir and cook for 2 minutes.
It will thicken up slightly.
Add the tuna and the creole seasoning.
Stir in and heat through.
Serve over the rice.
Serves 4
Saturday, October 16, 2010
Cooking Rice
 Rice is always a good staple to have in your pantry. It is pretty versatile.
You can just have it as a side or use it in a casserole. You can even make a salad with it.
But, it all starts with cooking it first. Which is pretty easy. You don't need a fancy rice cooker. Just a pan with a tight fitting lid.
How long it takes to cook the rice depends on the kind you buy.
Minute rice is the fastest rice to make. It is already precooked so you just have to bring it to a boil and it's pretty much ready.
Brown rice, on the other hand, takes the longest. But, it is healthier.
Regular white rice, that you buy in the bag takes about twice the time as minute rice and a little less than half the time of brown rice.
Cooking rice is pretty simple. And you can vary the taste by the liquid and seasonings you cook it in or anything you add in when it's done.
The basic method of cooking rice is using 2 parts liquid to 1 part rice.
Start off by deciding what flavor you want to give to your rice.
You can just use plain water with nothing added. Or, if you want to add a bit of flavor, add some salt and a little butter to the water before adding the rice.
You can also cook the rice in chicken broth.
Add different spices to the water or chicken broth. Use parsley or curry powder. Maybe lemon pepper seasoning.
After deciding how you want your rice to taste, get out a medium sized saucepan and add your broth or water to it. Add any seasonings you are using.
Turn the heat to medium high and bring to a boil.
While the cooking liquid is heating up, rinse the rice in a strainer and make sure to drain it well.
When the liquid is boil, add the rice quickly.
Let the water come back to a boil.
Cover.
Turn the heat down to low and let cook undisturbed.
For white rice, it takes about 15 minutes.
For brown rice, it takes about 40 minutes.
The rice is done when the water has all absorbed into the rice.
It's time to serve, add in things such as cheese or salsa, or use it as an ingredient in another dish.
Tuesday, October 12, 2010
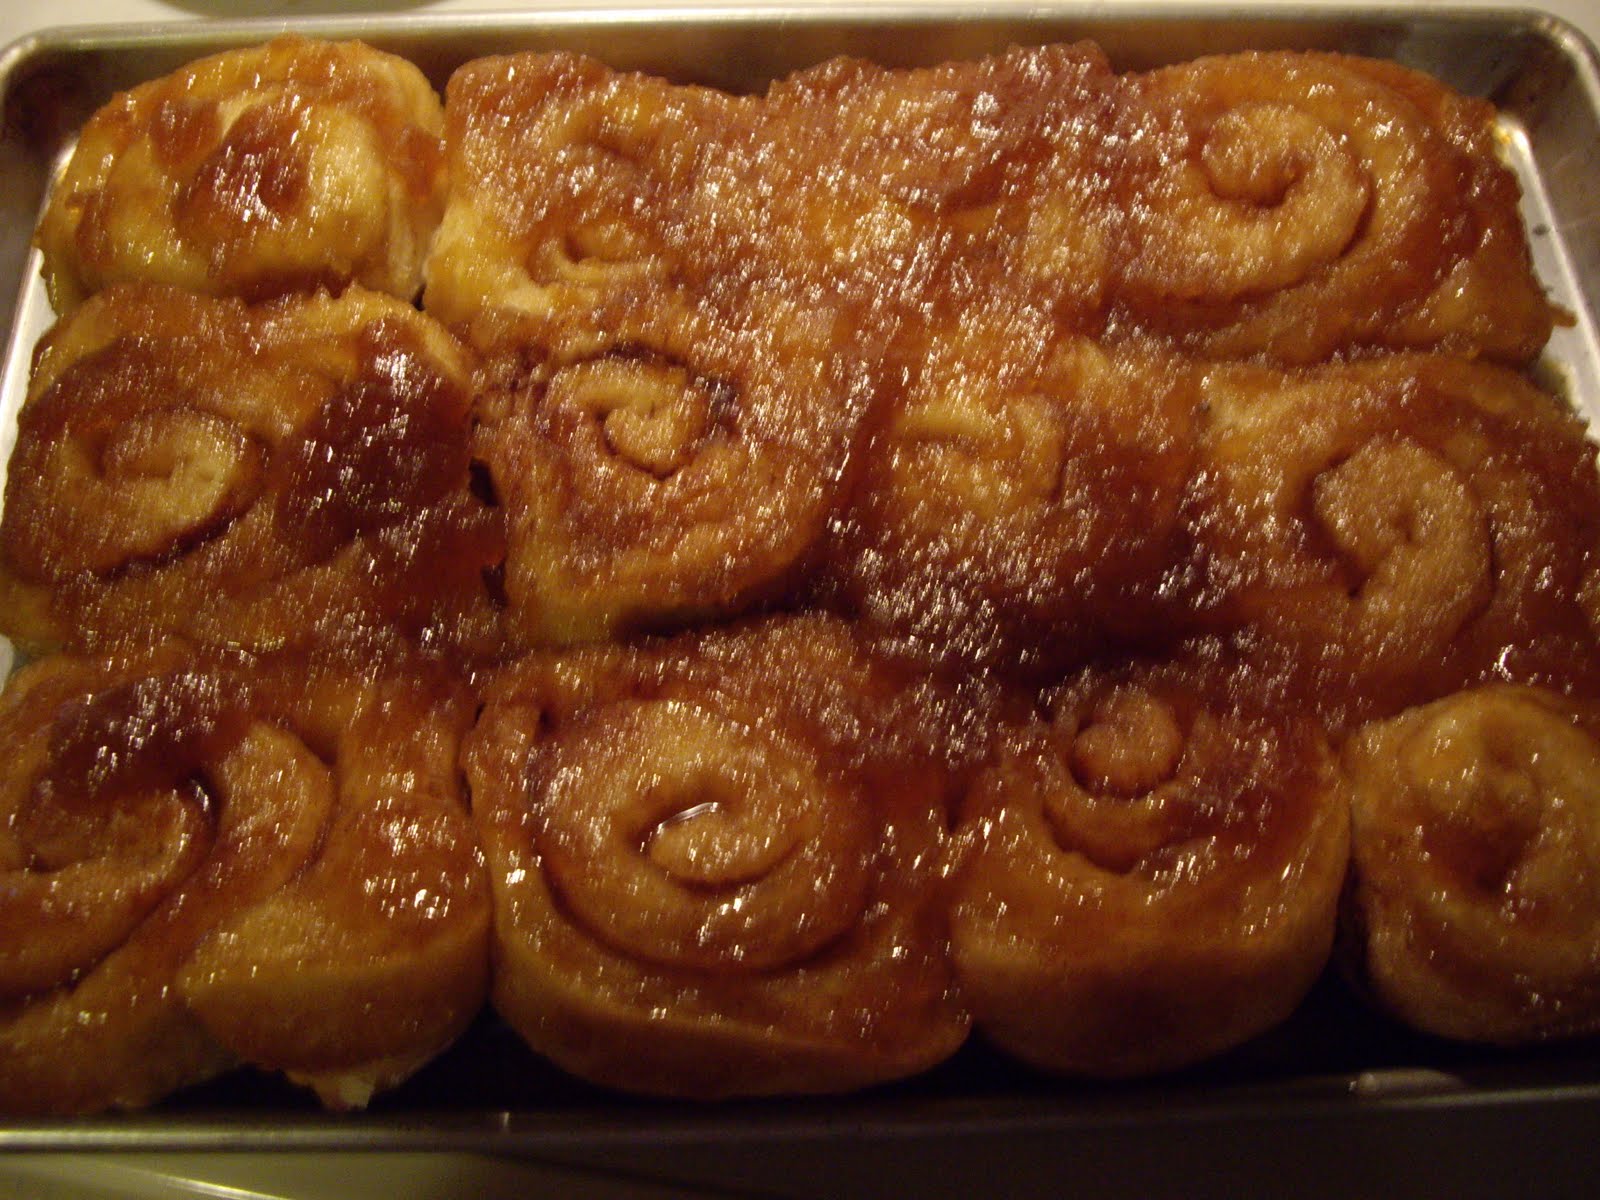
Overnight Carmel Apple Rolls
 These are very good rolls. They are very light and a little different from your usual cinnamon or caramel rolls.
They are also great for mornings. You make them up the night before and stick them in the fridge. In the morning, just pop them in the oven for a yummy breakfast.
You will need a 9"x13" baking pan.
A larger rectangular pan or platter for serving.
You will also need a rolling pin.
Ingredients:
Rolls-
3 to 3-1/2 cups flour
1/4 cup sugar
1 teaspoon salt
1/2 cup applesauce
1/2 cup milk
1/4 cup(1/2 stick) butter
1 egg
Caramel topping-
1 cup packed brown sugar
1 cup applesauce
6 Tablespoons butter, melted
Filling-
4 Tablespoons(1/2 stick)butter, softened
3/4 cup sugar
1 Tablespoon ground cinnamon
Combine 1 cup flour, the sugar, salt, and yeast. Set aside.
In a small saucepan warm the applesauce, milk, and butter. Heat just until butter almost melts.
Add to the flour mixture with the egg.
With a spoon or mixer stir in until everything is moistened.
Add another 1-1/2 cups flour and mix in until dough pulls away from the sides of the bowl.
Turn out the dough onto a floured surface and knead in the remaining flour. The dough should be smooth and elastic.
If you have a mixer with a dough hook, use that and knead til dough is smooth and elastic.
The dough will be soft.
Put the dough into a greased bowl and cover. Put into a warm spot and let rise for about 45 minutes until double.
Grease the 9"x13" pan. Combine the topping ingredients in the bottom and spread it out evenly.
When the dough has risen, roll it out on a floured surface into a 15"x12" rectangle.
Spread the butter evenly over the dough.
Sprinkle the sugar and the cinnamon over the butter.
Working from the long side, roll up the dough and pinch to seal. You want to roll tight enough that the sugar and cinnamon won't come out. But you don't want it too tight so that the middle of the roll pops out while it bakes.
Cut the rolls into 12 even slices. Lay over the topping.
 Cover the pan with buttered foil and stick in the fridge. Buttering is just in case they rise too high and hit the foil. This way they won't stick.
Take the rolls out of the fridge 30 minutes before baking. Preheat your oven to 400 degrees Fahrenheit.
Uncover the rolls and bake for 20-25 minutes until golden brown.
Remove from oven and let stand for 1 minute.
Take your larger pan or platter and lay it top side down over the pan of rolls.
Quickly flip both pans at once so the pan of rolls is bottom side down over the other pan.
Carefully lift the baking pan off the rolls.
Scrape any remaining topping out of the pan onto the rolls.
Whoopie Pies
 Whoopie pies are two soft chocolate cookies sandwiched together with a creamy vanilla filling.
Very, very yummy!
The cookie dough may seem more like a cake batter, but that is the way it is supposed to be.
Trust me.
You will need a large bowl for your cookie dough.
You will also need a second bowl for the filling.
You will need cookie sheets.
Preheat your oven to 400 degrees Fahrenheit.
Ingredients:
cookies-
1 cup shortening
2 cups sugar
2 eggs
2 egg yolks
1 cup sour milk
1 cup hot water
4 cups flour
1 teaspoon baking powder
2 teaspoons baking soda
1/2 teaspoon salt
1 cup cocoa powder
filling-
2 egg whites
4 Tablespoons flour
4 Tablespoons milk
2 teaspoons vanilla extract
3-1/2 cups plus 2 Tablespoons powdered sugar, divided
1-1/2 cups shortening
For the cookies-
Cream the shortening and sugar together.
Add the cocoa powder and the eggs, egg yolks, and hot water.
Mix well.
Add the flour, baking soda, baking powder, salt and sour milk and beat in until smooth.
With a spoon or medium size cookie scoop, drop cookies onto cookie sheets.
Try and put even numbers on each sheet so you will know you will not end up with an odd number of cookies.
Bake in the preheated oven for 10 minutes. Remove to a rack to cool.
While they cool, make your filling.
To make the filling:
Beat together the egg whites, flour, milk, vanilla extract, 2 Tablespoons powdered sugar and the shortening. It won't get really smooth and that's OK.
Beat in the remaining powdered sugar until the filling is very creamy.
To assemble, spread the filling on the flat side of one cookie. Take another cookie and put it flat side against the filling to make a sandwich.
You will end up with about 34 good size whoopie pies. Maybe more, if you make them smaller.
To store them, make sure to put a paper towel in between each layer to prevent sticking.
You're gonna love them!
Monday, October 11, 2010
Some Cooking Terms To Know
When you are following a recipe there are always terms that used that you may not know.
I am going to give you some terms so you know what you need to do.
This list pretty much is for combining the ingredients.
Beat: For using a spoon, whisk, or electric mixer. You make the mixture smooth by using a vigorous over and under motion.
Blend: Thoroughly combining the ingredients until everything is smooth and uniform. Stir not as hard as with beating.
Fold: Use a rubber or silicone spatula for this. It is a two-fold motion. First you cut down through the mixture and underneath and fold the whole thing over on itself. Turn the bowl a 1/4 of a turn for every fold.
It is meant to be done slow and deliberate.
Because when folding in too fast, whatever you are folding in could break down.
A good example of this is beaten egg whites.
Mix: Just combine it up to distribute all the ingredients.
Stir: Mix ingredients with a circular or figure eight motion til everything is uniform.
Toss: With a spoon or fork or your hands just toss the ingredients together.
Just kinda fluff them. Don't stir.
Sunday, October 10, 2010
Brocolli, Chicken, Cheesy Rice Casserole
 This is a really great casserole.
It has chicken and cheese. It has the healthy broccoli in it. And it is quick to put together.
I always use long grain white rice, but feel free to use whatever kind you prefer.
Preheat your oven to 350 degrees Fahrenheit.
You will need a 2 quart greased casserole dish, preferably with a lid.
Ingredients:
3 cups cooked white rice
1(10-1/4 oz) can condensed cream of chicken OR cream of mushroom soup
2 cups shredded cheddar cheese
1-2 cups fresh or frozen cut up broccoli
1/4 cup chopped onion, optional
2 cups chopped up cooked chicken
4 slices American cheese, optional
If you are using fresh broccoli, you may want to partially cook it first before adding it. Otherwise it may stay somewhat crunchy.
In a large bowl, mix the soup and the rice.
Add the cheddar cheese, chicken, broccoli, and optional onion.
Pour into the prepared casserole dish.
If using, lay the slices of cheese over the rice mixture. Using the cheese slices will add a little more creaminess to the finished meal.
Cover the casserole and bake for about 30 - 40 minutes until bubbly and or cheese slices are melted.
Remove from the oven.
Take off lid and stir in the melted cheese.
Serves 6.
Pumpkin Custard

This is my recipe for pumpkin pie filling, just baked in a casserole with no crust.
This is a great way to go gluten free without having to have special flour too.
You will need a 1-1/2 to 2 quart casserole dish Or 6 (6oz.) custard dishes.
You will also need a 2 quart saucepan.
Preheat your oven to 375 degrees Fahrenheit.
Ingredients:
15 or 16 oz pureed pumpkin
3/4 cup brown sugar
1-1/4 teaspoon ground cinnamon
1/2 teaspoon salt
1/2 teaspoon ground ginger
1/4 teaspoon ground cloves
1(12oz) can evaporated milk OR 1/2 cup regular milk
2 eggs
In your saucepan, combine the pumpkin,brown sugar, cinnamon, cloves, and salt.
Heat and stir over medium heat just til mixture comes to a sputtering boil.
Turn down to a simmer and keep stirring for 3-5 minutes until the pumpkin mixture has thickened somewhat and is shiny.
Pour into a large bowl and mix in the milk and than add the eggs one at a time.
Stir, or beat with mixer, while you are adding the milk and eggs.
Pour the custard into the casserole dish and bake for 45-50 minutes or into the individual custard dishes and bake for 30 minutes.
Check after 30 minutes for the casserole or 25 minutes for the custard dishes. Insert the tip of a knife into the center of the custard and if done, the knife will come out clean. It will be wet but have no custard clinging to it.
Since there is no crust for any of the liquid from the filling to absorb, there may be some liquid rise to the top of the custard.
This is normal.
It may go away during baking and it may not.
If it doesn't and you don't want it there, when the custard is cool blot the top of it with a paper towel.
Serves 6.

Tuesday, October 5, 2010
Apple Butter
 I just love, love, love this apple butter. It is different than your store bought variety.
But, if you love apple and cinnamon(and who doesn't?) than this apple butter is for you.
It is super simple to make too.
You will need a large pot for cooking.
You will need 4-5 pint jars with flats and rings.
A water bath canner.
Ingredients:
8 cups unsweetened applesauce
1 cup apple cider vinegar
4 cups brown sugar
4-1/2 teaspoons ground cinnamon
Combine the applesauce, vinegar, brown sugar, and cinnamon in your large cooking pot.
Bring to a boil over medium heat and turn down to low, stirring very frequently.
Cook until the butter reaches desired consistency. This will take probably 45 minutes.
It is important that you keep it stirred so it will not burn.
Remove from the heat and put into the prepared jars. Seal.
Process in a water bath canner for 10 minutes.
Friday, October 1, 2010
Pear Bread
 If you have never tried pear bread, there is no time like the present. This quick bread is so moist and so yummy that you'll wonder why you haven't tried it sooner.
You will need two 9"x5" loaf pans, greased
Preheat your oven to 350 degrees Fahrenheit.
Ingredients:
3 eggs
1-1/2 cups sugar
3/4 cup cooking oil
1 teaspoon vanilla extract
3 cups flour
2 teaspoons baking powder
2 teaspoons cinnamon
1 teaspoon baking soda
1 teaspoon salt
4 cups peeled,cored and finely chopped pears
1 teaspoon lemon juice
In a large bowl, combine the eggs, sugar, cooking oil, and vanilla extract.
Mix in the cinnamon.
Stir in the baking soda, baking powder, and salt.
Mix in the flour.
Toss the pears and the lemon juice and add to the batter.
Mix well and divide batter between the 2 pans.
Bake for 55-60 minutes until the loaves test done when checked with a toothpick.
Cool in pans for 10 minutes.
Loosen and turn out onto wire racks to cool.
Makes 2 tasty loaves.

Pear Orange Butter
 This isn't just plain pear butter. It has a bit of orange flavor and ginger too.
Great on biscuits!
Just try it and you won't be disappointed.
You will need a 4-5 quart pot for making the butter.
A colander or food mill is needed. Or you can peel the pears and puree them in a blender.
You will need 3 pint jars or 5-6 half-pint jars along with lids, prepared.
A water bath canner.
Ingredients:
4 lbs. ripe, juicy pears, cored and chopped
1 cup orange juice
3 Tbs. lemon juice
2 cups sugar
1/2 tsp. ground ginger
Combine the pears, orange juice, and lemon juice in your large pot.
Bring to a boil over medium heat.
Reduce the heat to low.
Cover and simmer for about 30 minutes or until pears are very soft. Stir occasionally.
Remove from heat and run through a colander or food mill, or puree if you peeled the pears.
Return the puree to the pot and add the sugar, stirring til it is dissolved.
Simmer for 40 minutes until butter gets fairly thick.
Stir almost constantly.
Stir in the ginger and cook for another 10-15 minutes.
Remove from heat and put the butter into jars and seal.
Process in a boiling water canner for 10 minutes.
Subscribe to:
Posts (Atom)