If you have never had a homemade pot pie, you are in for a treat. It is comfort food that warms you up on a cold day.
This is a good way to use up leftover turkey or chicken. You can also use cubed chicken breasts or cook 2-3 chicken hindquarters, take it off the bone and chop.
You need pastry for 9" two crust pie.
You also will need a 9" square pan.
Preheat your oven to 425 degrees Fahrenheit.
For the filling:
a heaping half cup of frozen peas and a heaping half cup of frozen carrots
you can also use a 10oz. bag of mixed peas and carrots.
3 Tablespoons butter
1/3 cup flour
1/4 cup onion, chopped
1/2 teaspoon salt
1/4 teaspoon pepper
1-3/4 cup chicken or turkey broth-canned, homemade, or use water and bouillon granules
2/3 cup milk
2-1/2 to 3 cups chopped turkey or chicken
Roll the pie dough out into a big enough square so you can just put it into the pan, add the filling and fold the top over. It might have a couple uncovered spots near the middle. But you need to slash holes in the top crust anyway so this works out well.
To make the filling,
Melt the butter in a saucepan and add the onion and cook til tender. Add the flour, salt and pepper.
Let it get bubbly and take off the heat. Add the milk and broth and put back on heat.
Bring to a boil. Let it boil 1 minute and keep stirring.
Stir in the turkey and carrots and peas.
Pour the filling into the crust and flip the crust over the filling.
Make air holes if you need.
Bake for about 35 minutes.
Let it sit for about 5 to 10 minutes before cutting into so the filling won't all run all over.
It serves 6 good size servings.
 These cookies are simply fabulous. It's a chocolate cookie with peanut butter in the middle. Hence the name- magic in the middle.
I love making these with my daughter.
These are 2 step cookies.
Preheat your oven to 375 degrees Fahrenheit.
Lightly grease(or use parchment) 2 or 3 cookie sheets
Ingredients:
Filling-
3/4 cup smooth peanut butter
3/4 cup powdered sugar
Dough-
1-1/2 cups flour
1/2 cup cocoa powder
1/2 teaspoon baking soda
1/4 teaspoon salt
1/2 cup granulated sugar + a little extra for dipping
1/2 cup brown sugar
1/2 cup(1 stick) butter, softened
1/4 cup smooth peanut butter
1 teaspoon vanilla extract
1 large egg
In a medium bowl add the peanut butter and powdered sugar for the filling.
Work it together with a spoon and than your hands. At first it will become crumbly, but keep working it together and it will become very smooth like modeling clay.
Set aside.
In another bowl whisk the flour, cocoa powder,baking soda, and salt.
Set aside.
In another bowl beat together the butter, peanut butter, and sugars until light and fluffy.
Add the egg and vanilla extract and beat.
Blend in the flour mixture.
Now it is time to roll the cookie and filling into balls.
You will need to get 26 filling balls and 26 cookie dough balls.

 Once you have that done, you need to put the filling into the dough.
Take a ball of dough and make an indention in the middle, stick the filling in it and seal it up.
 Once you have the filling sealed inside the dough, smooth it into a ball.
Dip the tops of the cookies in a small amount of sugar.
Place on cookie sheet.
With a bottom of a glass, flatten the cookies slightly to about 1/2 inch thick.
Bake the cookies for 7-9 minutes, just until they are set.
Cool on a wire rack.
Makes 26 yummy cookies
 This dip is super easy to make. Just put everything into a bowl and stir. There ya go.
Ingredients:
1-1/2 cups sour cream
1/2 cup mayonnaise
1 teaspoon ground cumin
1/4 teaspoon garlic salt
1/4 teaspoon dried minced onion
1/4 teaspoon paprika
1 cup shredded cheddar cheese
1(4 oz.) can chopped green chilies, drained or 1/4 cup chopped fresh chili
In a bowl add the sour cream, mayonnaise, and spices.
Stir thoroughly.
Mix in the chilies and cheese.
Chill for 2-4 hours in the fridge to blend the flavors.
Serve with tortilla chips.
Makes a little over 2 cups dip.
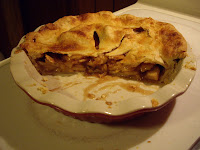 I have always been a huge fan of apple pie. It is one of my top two favorites.
I prefer a butter crust for this pie. But, a simple shortening pie crust tastes marvelous here too.
It isn't super simple but the results are worth it.
Ingredients:
Dough for a double 9" pie crust
5-6 apples, cored, peeled and sliced- you will need to have 8 cups sliced apples
1 Tablespoon lemon juice, optional
1/4 cup brown sugar
1-1/2 teaspoons cinnamon
1/4 teaspoon nutmeg
1/4 teaspoon salt
2 Tablespoons butter
1 Tablespoon + 1 teaspoon cornstarch
Make the dough for the pie crusts and wrap and refrigerate while making the apple filling.
Put the sliced apples into a large bowl. Sprinkle with the lemon juice, brown sugar,cinnamon, nutmeg, and salt. Toss well.
Let it set for an hour to bring out the apple juices.
Take the pie dough out to soften.
Drain the juices into a small saucepan.
Add the butter.
Bring to a boil over medium high heat.
Swirl the liquid so it doesn't burn, but you don't need to stir.
Reduce the liquid by about half.
Put the apples back into the large bowl and sprinkle with cornstarch. Toss till cornstarch is blended in.
Add the reduced liquid.
Toss well.
On a floured counter, roll out the bottom crust.
Add the filling.
Roll out top crust and lay it over the filling.
Fold the top down under the bottom crust and press to seal.
Crimp the edges with fingers or a fork.
Cover with a towel and refrigerate while preheating the oven.
Preheat your oven to 425 degrees Fahrenheit.
Take the pie out of the fridge and brush the top with milk.
Sprinkle with sugar.
With a knife, make some slashes in the top to let steam escape.
Bake for 45-55 minutes or til the apples are tender when pierced with a knife and the juices are bubbling thickly through the slashes.
After 30 minutes protect with a pie shield or foil ring.
Let rest for a few hours before serving.
Serves 6-8.
 This is a great dip this is definitely not for the tame of heart. If you have ever eaten chipotle peppers, you will realize this dip has a pretty good kick to it.
Chipotles are red smoked jalapenos. They have good heat with a smoky flavor.
I eat this mostly with tortilla chips, but I also use it as a topping for my chicken sandwiches.
If you can't find ground chipotle pepper, Penzey's Spices is a great place to find it.
Ingredients:
2 cups sour cream
1 cup mayonnaise
1-2 Tablespoons chipotle powder
4 teaspoons garlic powder
1 teaspoon salt
1/3 cup lime juice
In a medium-small bowl, mix all of the ingredients.
Start off with the lesser amount of chipotle powder and add more if you want.
For best flavor, cover and refrigerate for at least 2 hours before serving.
Makes about 3 cups dip.
 AKA butterscotchies. AKA oatmeal sccotchies. Whatever name you want to go by, they are fantastic.
I love this time of year. All the baking stuff is on sale!
Preheat your oven to 375 degrees Fahrenheit.
Grease a couple cookie sheets.
Ingredients:
3/4 cup(1-1/2 sticks) butter, softened
3/4 cup sugar
3/4 cup brown sugar
2 eggs
1 teaspoon vanilla extract
1-1/4 cups flour
1 teaspoon baking soda
1/2 teaspoon cinnamon
1/2 teaspoon salt
3 cups oatmeal
1-3/4 cups(11 oz pkg.) butterscotch chips
Beat the butter and both sugar together in a large bowl.
Add eggs and vanilla extract and mix well.
Add the cinnamon, baking soda, and salt.
Beat in the flour.
Stir in the chips and oatmeal.
Let the cookie dough rest for about 10 minutes to help soften the oatmeal.
With a cookie scoop or spoon, drop dough onto the prepared cookie sheets.
Bake 8-10 minutes until cookies start to brown.
They may seem not done, but they are fine. They will finish out of the oven.
Remove from the oven and let sit for a few minutes before removing to a cooling rack.
You will get about 4 dozen cookies.
 This is a somewhat unconventional chili. It is made with chicken, white beans, and cheese.
It is great on a cold day and it makes a ton so it is perfect for gatherings or leftovers.
You make it in the crockpot.
You will need a large crockpot.
Ingredients:
4 skinless, boneless chicken breast halves.
6 cups water
1 large chopped onion
2 garlic cloves, minced
1 Tablespoon oil
2-4(4 oz. can) chopped green chilies OR seed and chop 1 whole green chili pepper
1-2 diced jalapeno OR Serrano peppers
2 teaspoons ground cumin
1-1/2 teaspoon dried oregano
1/4 teaspoon cayenne pepper
3/4 teaspoon salt
3 1b. can navy beans OR cook and season 3 cups of dry navy beans
2 cups shredded cheddar or Monterey jack cheese
Add the chicken and water to the crockpot and let it cook on low for 3-4 hours.
Remove chicken from the water, cube and set to the side.
While the chicken is cooking saute the onion and garlic in the oil.
Add the chili and jalapeno peppers, cumin, oregano, cayenne, and salt. Cook and stir two minutes.
After removing chicken from the crockpot add the onion/pepper mixture.
Add the beans. If you are using canned pour straight in, if you are using beans you cooked drain before adding to the crockpot.
Cook on low for an hour.
Add the chicken.
Stir in the cheese until it is melted in.
Serve.
This makes about 10-12 servings.
Great served with sour cream.
Ginger is a great herb in so many ways. It does more than just give great flavor to your foods.
Ginger can be used in many ways.
You can buy a ginger root and grate it or chop it.
You can buy dried ginger that is ground.
You can also buy crystallized ginger.
Ginger has preserving properties. If you have ever made gingerbread cookies, you will notice that they keep and taste good for a really long time.
Ginger is also good for your health.
It will help nausea. It also helps your body digest fatty foods.
It also helps get rid of heartburn and the pain of arthritis.
It can also be good for your blood and ultimately your heart- it helps in the same way aspirin does.
So, the next time you add ginger to your yummy stuff know that you are doing something good for yourself.
Skinning chicken can be a hard thing to accomplish.
Some people hate skin, while others won't go without.
But, it is healthier to eat chicken without the skin. All the fat is right underneath the skin.
Skinning chicken is pretty simple.
A lot of people talk about skinning it when it is partially frozen.
That is fine, but it is awfully cold.
If you have hands that are overly sensitive to the cold, you might want to try another method.
Here is what I do:
Have a few napkins or paper towels handy.
Get your poultry cut how you want.
Grab a paper towel in your hand and use that to skin the chicken.
Now, on one side, loosen the skin away from the meat.
With the paper towel in your hand, grab a hold of the skin and pull it down and off of the bone.
By using the napkin or paper towel, your hand will not get all slick from the chicken fat.
You will have a good grip and be able to pull it off.
When you just use your hands, your hands get really slippery and the skin just doesn't want to pull off the bone.
Works like a charm!
 Chocolate chip cookies are always good. And these are no ordinary chocolate chip cookies.
They are soft and seem to have more semi-sweet chocolate flavor than in most cookies.
Preheat your oven to 375 degrees Fahrenheit.
Grease, or line with parchment, some cookie sheets.
Ingredients:
3/4 cup(1-1/2 sticks) unsalted butter, softened
2/3 cup packed brown sugar
2/3 cup sugar
2 Tablespoons light corn syrup
1 Tablespoon cider or white vinegar
2 eggs
1 Tablespoon vanilla extract
1/2 teaspoon salt
1/2 teaspoon baking powder
1/4 teaspoon baking soda
2-1/4 cups flour
3 cups semi-sweet chocolate chips
In a large bowl, cream together the butter, sugars, corn syrup, and vinegar.
Beat in the eggs.
Mix in the vanilla extract, salt, baking powder, and baking soda.
Stir in the flour, than the chocolate chips.
With a tablespoon or medium cookie scoop, drop cookies on the cookie sheets.
Bake for 10 minutes, just til set. The centers may look soft.
Take them out of the oven and remove to racks to cool.
Makes about 4 dozen cookies.
 Creole rub seasoning is great for using as a rub for meat and poultry. It also is great to add to recipes.
It isn't very spicy, but it does have a bit of warmth to it.
I use this in Tuna Creole. I also love to rub it on ribs or chicken before I put the meat on the grill.
Ingredients:
3 Tablespoons paprika
2 Tablespoons salt
1 Tablespoon garlic powder
1 Tablespoon ground black pepper
1 Tablespoon onion powder
1 Tablespoon cayenne pepper
1 Tablespoon dried oregano
1 Tablespoon dried thyme
Combine all the spices in a jar with a lid.
Screw on the lid tightly and shake to mix.
Will keep fresh for 6 months.
Makes about 3/4 cup.
Good tip- when you empty a spice jar, wash it out and save it for storing your homemade seasonings.
 I love this stuff. Tuna Creole is a good simple meal that is equally easy on your pocketbook.
In the time it takes to cook the rice, you can have the creole done. Super quick!
Ingredients:
1/4 cup chopped mild green chili pepper
2 Tablespoons butter
2 Tablespoons flour
1/2 teaspoon sugar
1/2 teaspoon salt
1/8 teaspoon pepper
1/3 cup milk
1-3/4 to 2 cups chopped tomatoes, canned(15oz can) or fresh
1(6 oz) can tuna, drained
1 teaspoon creole seasoning
3 cups hot cooked rice, for serving
Melt the butter in a large saucepan.
Add the chopped pepper and cook until tender.
Stir in the flour, sugar, salt, and pepper.
Gradually add the milk, stirring constantly. Add the tomatoes and bring to a boil.
Continue to stir and cook for 2 minutes.
It will thicken up slightly.
Add the tuna and the creole seasoning.
Stir in and heat through.
Serve over the rice.
Serves 4
 Rice is always a good staple to have in your pantry. It is pretty versatile.
You can just have it as a side or use it in a casserole. You can even make a salad with it.
But, it all starts with cooking it first. Which is pretty easy. You don't need a fancy rice cooker. Just a pan with a tight fitting lid.
How long it takes to cook the rice depends on the kind you buy.
Minute rice is the fastest rice to make. It is already precooked so you just have to bring it to a boil and it's pretty much ready.
Brown rice, on the other hand, takes the longest. But, it is healthier.
Regular white rice, that you buy in the bag takes about twice the time as minute rice and a little less than half the time of brown rice.
Cooking rice is pretty simple. And you can vary the taste by the liquid and seasonings you cook it in or anything you add in when it's done.
The basic method of cooking rice is using 2 parts liquid to 1 part rice.
Start off by deciding what flavor you want to give to your rice.
You can just use plain water with nothing added. Or, if you want to add a bit of flavor, add some salt and a little butter to the water before adding the rice.
You can also cook the rice in chicken broth.
Add different spices to the water or chicken broth. Use parsley or curry powder. Maybe lemon pepper seasoning.
After deciding how you want your rice to taste, get out a medium sized saucepan and add your broth or water to it. Add any seasonings you are using.
Turn the heat to medium high and bring to a boil.
While the cooking liquid is heating up, rinse the rice in a strainer and make sure to drain it well.
When the liquid is boil, add the rice quickly.
Let the water come back to a boil.
Cover.
Turn the heat down to low and let cook undisturbed.
For white rice, it takes about 15 minutes.
For brown rice, it takes about 40 minutes.
The rice is done when the water has all absorbed into the rice.
It's time to serve, add in things such as cheese or salsa, or use it as an ingredient in another dish.
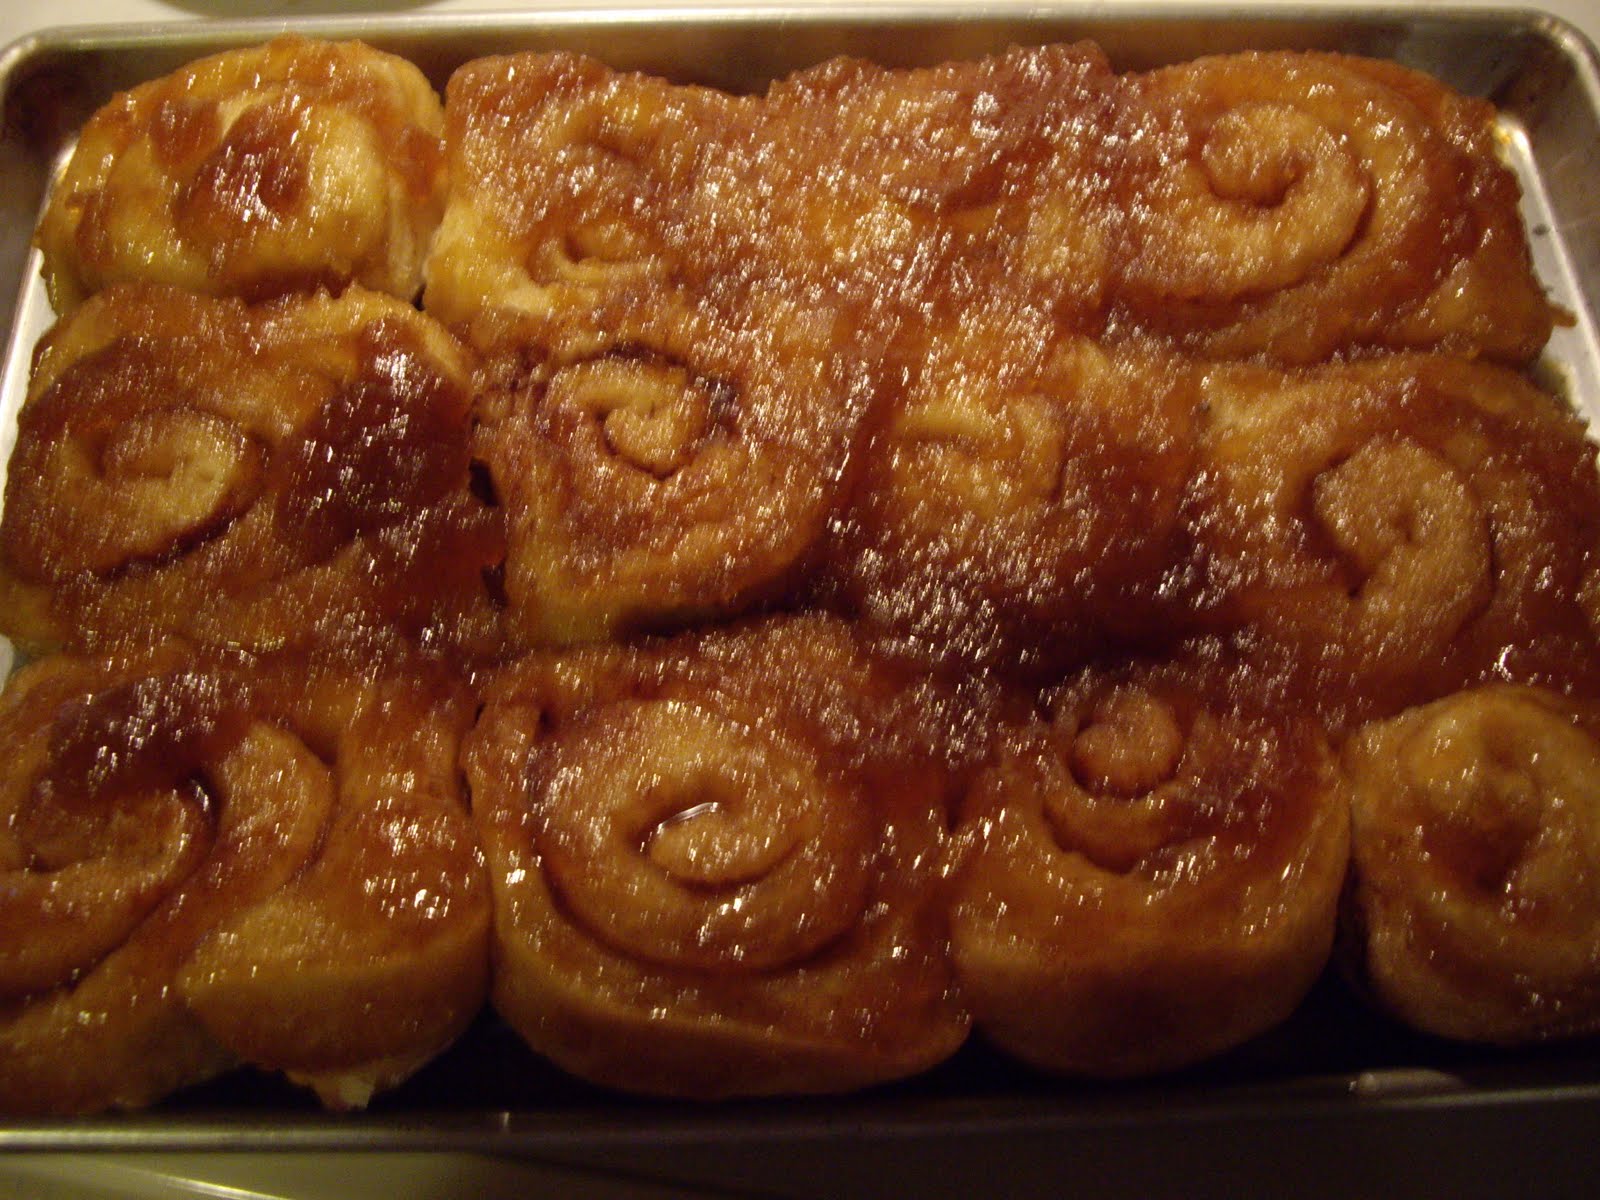
 These are very good rolls. They are very light and a little different from your usual cinnamon or caramel rolls.
They are also great for mornings. You make them up the night before and stick them in the fridge. In the morning, just pop them in the oven for a yummy breakfast.
You will need a 9"x13" baking pan.
A larger rectangular pan or platter for serving.
You will also need a rolling pin.
Ingredients:
Rolls-
3 to 3-1/2 cups flour
1/4 cup sugar
1 teaspoon salt
1/2 cup applesauce
1/2 cup milk
1/4 cup(1/2 stick) butter
1 egg
Caramel topping-
1 cup packed brown sugar
1 cup applesauce
6 Tablespoons butter, melted
Filling-
4 Tablespoons(1/2 stick)butter, softened
3/4 cup sugar
1 Tablespoon ground cinnamon
Combine 1 cup flour, the sugar, salt, and yeast. Set aside.
In a small saucepan warm the applesauce, milk, and butter. Heat just until butter almost melts.
Add to the flour mixture with the egg.
With a spoon or mixer stir in until everything is moistened.
Add another 1-1/2 cups flour and mix in until dough pulls away from the sides of the bowl.
Turn out the dough onto a floured surface and knead in the remaining flour. The dough should be smooth and elastic.
If you have a mixer with a dough hook, use that and knead til dough is smooth and elastic.
The dough will be soft.
Put the dough into a greased bowl and cover. Put into a warm spot and let rise for about 45 minutes until double.
Grease the 9"x13" pan. Combine the topping ingredients in the bottom and spread it out evenly.
When the dough has risen, roll it out on a floured surface into a 15"x12" rectangle.
Spread the butter evenly over the dough.
Sprinkle the sugar and the cinnamon over the butter.
Working from the long side, roll up the dough and pinch to seal. You want to roll tight enough that the sugar and cinnamon won't come out. But you don't want it too tight so that the middle of the roll pops out while it bakes.
Cut the rolls into 12 even slices. Lay over the topping.
 Cover the pan with buttered foil and stick in the fridge. Buttering is just in case they rise too high and hit the foil. This way they won't stick.
Take the rolls out of the fridge 30 minutes before baking. Preheat your oven to 400 degrees Fahrenheit.
Uncover the rolls and bake for 20-25 minutes until golden brown.
Remove from oven and let stand for 1 minute.
Take your larger pan or platter and lay it top side down over the pan of rolls.
Quickly flip both pans at once so the pan of rolls is bottom side down over the other pan.
Carefully lift the baking pan off the rolls.
Scrape any remaining topping out of the pan onto the rolls.
 Whoopie pies are two soft chocolate cookies sandwiched together with a creamy vanilla filling.
Very, very yummy!
The cookie dough may seem more like a cake batter, but that is the way it is supposed to be.
Trust me.
You will need a large bowl for your cookie dough.
You will also need a second bowl for the filling.
You will need cookie sheets.
Preheat your oven to 400 degrees Fahrenheit.
Ingredients:
cookies-
1 cup shortening
2 cups sugar
2 eggs
2 egg yolks
1 cup sour milk
1 cup hot water
4 cups flour
1 teaspoon baking powder
2 teaspoons baking soda
1/2 teaspoon salt
1 cup cocoa powder
filling-
2 egg whites
4 Tablespoons flour
4 Tablespoons milk
2 teaspoons vanilla extract
3-1/2 cups plus 2 Tablespoons powdered sugar, divided
1-1/2 cups shortening
For the cookies-
Cream the shortening and sugar together.
Add the cocoa powder and the eggs, egg yolks, and hot water.
Mix well.
Add the flour, baking soda, baking powder, salt and sour milk and beat in until smooth.
With a spoon or medium size cookie scoop, drop cookies onto cookie sheets.
Try and put even numbers on each sheet so you will know you will not end up with an odd number of cookies.
Bake in the preheated oven for 10 minutes. Remove to a rack to cool.
While they cool, make your filling.
To make the filling:
Beat together the egg whites, flour, milk, vanilla extract, 2 Tablespoons powdered sugar and the shortening. It won't get really smooth and that's OK.
Beat in the remaining powdered sugar until the filling is very creamy.
To assemble, spread the filling on the flat side of one cookie. Take another cookie and put it flat side against the filling to make a sandwich.
You will end up with about 34 good size whoopie pies. Maybe more, if you make them smaller.
To store them, make sure to put a paper towel in between each layer to prevent sticking.
You're gonna love them!
When you are following a recipe there are always terms that used that you may not know.
I am going to give you some terms so you know what you need to do.
This list pretty much is for combining the ingredients.
Beat: For using a spoon, whisk, or electric mixer. You make the mixture smooth by using a vigorous over and under motion.
Blend: Thoroughly combining the ingredients until everything is smooth and uniform. Stir not as hard as with beating.
Fold: Use a rubber or silicone spatula for this. It is a two-fold motion. First you cut down through the mixture and underneath and fold the whole thing over on itself. Turn the bowl a 1/4 of a turn for every fold.
It is meant to be done slow and deliberate.
Because when folding in too fast, whatever you are folding in could break down.
A good example of this is beaten egg whites.
Mix: Just combine it up to distribute all the ingredients.
Stir: Mix ingredients with a circular or figure eight motion til everything is uniform.
Toss: With a spoon or fork or your hands just toss the ingredients together.
Just kinda fluff them. Don't stir.
 This is a really great casserole.It has chicken and cheese. It has the healthy broccoli in it. And it is quick to put together.
I always use long grain white rice, but feel free to use whatever kind you prefer.
Preheat your oven to 350 degrees Fahrenheit.
You will need a 2 quart greased casserole dish, preferably with a lid.
Ingredients:
3 cups cooked white rice
1(10-1/4 oz) can condensed cream of chicken OR cream of mushroom soup
2 cups shredded cheddar cheese
1-2 cups fresh or frozen cut up broccoli
1/4 cup chopped onion, optional
2 cups chopped up cooked chicken
4 slices American cheese, optional
If you are using fresh broccoli, you may want to partially cook it first before adding it. Otherwise it may stay somewhat crunchy.
In a large bowl, mix the soup and the rice.
Add the cheddar cheese, chicken, broccoli, and optional onion.
Pour into the prepared casserole dish.
If using, lay the slices of cheese over the rice mixture. Using the cheese slices will add a little more creaminess to the finished meal.
Cover the casserole and bake for about 30 - 40 minutes until bubbly and or cheese slices are melted.
Remove from the oven.
Take off lid and stir in the melted cheese.
Serves 6.

This is my recipe for pumpkin pie filling, just baked in a casserole with no crust.
This is a great way to go gluten free without having to have special flour too.
You will need a 1-1/2 to 2 quart casserole dish Or 6 (6oz.) custard dishes.
You will also need a 2 quart saucepan.
Preheat your oven to 375 degrees Fahrenheit.
Ingredients:
15 or 16 oz pureed pumpkin
3/4 cup brown sugar
1-1/4 teaspoon ground cinnamon
1/2 teaspoon salt
1/2 teaspoon ground ginger
1/4 teaspoon ground cloves
1(12oz) can evaporated milk OR 1/2 cup regular milk
2 eggs
In your saucepan, combine the pumpkin,brown sugar, cinnamon, cloves, and salt.
Heat and stir over medium heat just til mixture comes to a sputtering boil.
Turn down to a simmer and keep stirring for 3-5 minutes until the pumpkin mixture has thickened somewhat and is shiny.
Pour into a large bowl and mix in the milk and than add the eggs one at a time.
Stir, or beat with mixer, while you are adding the milk and eggs.
Pour the custard into the casserole dish and bake for 45-50 minutes or into the individual custard dishes and bake for 30 minutes.
Check after 30 minutes for the casserole or 25 minutes for the custard dishes. Insert the tip of a knife into the center of the custard and if done, the knife will come out clean. It will be wet but have no custard clinging to it.
Since there is no crust for any of the liquid from the filling to absorb, there may be some liquid rise to the top of the custard.
This is normal.
It may go away during baking and it may not.
If it doesn't and you don't want it there, when the custard is cool blot the top of it with a paper towel.
Serves 6.

 I just love, love, love this apple butter. It is different than your store bought variety.
But, if you love apple and cinnamon(and who doesn't?) than this apple butter is for you.
It is super simple to make too.
You will need a large pot for cooking.
You will need 4-5 pint jars with flats and rings.
A water bath canner.
Ingredients:
8 cups unsweetened applesauce
1 cup apple cider vinegar
4 cups brown sugar
4-1/2 teaspoons ground cinnamon
Combine the applesauce, vinegar, brown sugar, and cinnamon in your large cooking pot.
Bring to a boil over medium heat and turn down to low, stirring very frequently.
Cook until the butter reaches desired consistency. This will take probably 45 minutes.
It is important that you keep it stirred so it will not burn.
Remove from the heat and put into the prepared jars. Seal.
Process in a water bath canner for 10 minutes.
 If you have never tried pear bread, there is no time like the present. This quick bread is so moist and so yummy that you'll wonder why you haven't tried it sooner.
You will need two 9"x5" loaf pans, greased
Preheat your oven to 350 degrees Fahrenheit.
Ingredients:
3 eggs
1-1/2 cups sugar
3/4 cup cooking oil
1 teaspoon vanilla extract
3 cups flour
2 teaspoons baking powder
2 teaspoons cinnamon
1 teaspoon baking soda
1 teaspoon salt
4 cups peeled,cored and finely chopped pears
1 teaspoon lemon juice
In a large bowl, combine the eggs, sugar, cooking oil, and vanilla extract.
Mix in the cinnamon.
Stir in the baking soda, baking powder, and salt.
Mix in the flour.
Toss the pears and the lemon juice and add to the batter.
Mix well and divide batter between the 2 pans.
Bake for 55-60 minutes until the loaves test done when checked with a toothpick.
Cool in pans for 10 minutes.
Loosen and turn out onto wire racks to cool.
Makes 2 tasty loaves.

 This isn't just plain pear butter. It has a bit of orange flavor and ginger too.
Great on biscuits!
Just try it and you won't be disappointed.
You will need a 4-5 quart pot for making the butter.
A colander or food mill is needed. Or you can peel the pears and puree them in a blender.
You will need 3 pint jars or 5-6 half-pint jars along with lids, prepared.
A water bath canner.
Ingredients:
4 lbs. ripe, juicy pears, cored and chopped
1 cup orange juice
3 Tbs. lemon juice
2 cups sugar
1/2 tsp. ground ginger
Combine the pears, orange juice, and lemon juice in your large pot.
Bring to a boil over medium heat.
Reduce the heat to low.
Cover and simmer for about 30 minutes or until pears are very soft. Stir occasionally.
Remove from heat and run through a colander or food mill, or puree if you peeled the pears.
Return the puree to the pot and add the sugar, stirring til it is dissolved.
Simmer for 40 minutes until butter gets fairly thick.
Stir almost constantly.
Stir in the ginger and cook for another 10-15 minutes.
Remove from heat and put the butter into jars and seal.
Process in a boiling water canner for 10 minutes.
 I love cheesy biscuits. They remind me somewhat of Cheddar Bay biscuits at Red Lobster. Not quite the same, but it's getting there.
I love serving them with lasagna or spaghetti. Maybe even some seafood.
If you are serving Mexican, add a bit of cumin or chili powder to give it a little different taste.
You will need to baking sheet to bake the biscuits.
You will need a biscuit cutter.
A pastry brush is helpful here.
Preheat your oven to 425 degrees Fahrenheit.
Ingredients:
2 cups flour
1 teaspoon salt
1 Tablespoon baking powder
1/2 cup(1 stick) butter- if you want to cut fat lower down to 1/3 cup
1 cup shredded cheddar cheese
3/4 cup milk
6 Tablespoons butter, melted
1 teaspoon garlic powder
2 teaspoons dried parsley flakes
In a medium bowl, add the flour, baking powder, and salt. Stir to combine.
With a fork or pastry cutter, cut in the butter til dough is crumbly.
Stir in the cheese.
Pour the milk into the center of the mixture and stir, just until moistened.
Turn out onto floured counter and knead about 10 times-just til dough comes together.
With your hands or a rolling pin,pat or roll the dough until it is about 1/2" thick.
With a biscuit cutter or cookie cutter cut out the dough.
You will have 8-10 biscuits depending on the size of the cut out biscuits and how thick you rolled them.
Put the biscuits on the baking sheet and bake for 10-12 minutes.
The biscuits will be golden and when lightly touched, they will spring back.
While the biscuits are baking, melt the 6 Tablespoons butter and mix in the garlic powder and parsley flakes.
After removing biscuits from the oven, brush the garlic/butter mixture over the biscuits. Use all the butter up. The biscuits will soak it in.
Best served warm.
Yummy goodness!
 What can you say about an oatmeal raisin cookie? They are hearty and super good. The raisins just add a little somethin', somethin' to the humble oatmeal cookie
.
You will need 2 or 3 cookie sheets.Preheat your oven to 375 degrees Fahrenheit.
Ingredients:
3/4 cup unsalted butter, softened
1 cup packed brown sugar
1/2 cup sugar
1 teaspoon baking powder
1/4 teaspoon baking soda
1/2 teaspoon ground cinnamon
1/4 teaspoon ground cloves
1 egg
1 teaspoon vanilla extract
1-3/4 cups flour
2 cups oatmeal
In a large bowl, beat the butter, brown sugar, sugar, baking powder, baking soda,cinnamon, and cloves.
Add the egg and vanilla extract and beat in well.
Mix in the flour.
Add the oatmeal.
Stir in the raisins.
Drop cookies by scoop or spoon onto the cookie sheets.
Bake for 10-12 minutes until cookies start to brown around the edges.
Cool on a wire rack.
Makes 3-4 dozen, depending on whether you use a small scoop or a medium scoop.

 If you have never had pear pie before, you are in for a treat. It is similar to apple pie, but there is that subtle difference that says pear.
This version of pear pie has a streusel topping instead of a top crust.

Preheat your oven to 450 degrees Fahrenheit.
You will need a 9" pie pan.
Ingredients:
single pastry crust for 9" pie
1/2 cup sugar
3 Tablespoons flour
1/4 teaspoon salt
1 teaspoon cinnamon
5 cups peeled and sliced pears
1 Tablespoon butter
1 Tablespoon lemon juice
1 cup flour
1/2 cup packed brown sugar
7 Tablespoons butter
1/4 teaspoon cinnamon
1/4 teaspoon nutmeg
1/2 cup chopped nuts-optional
Make pastry and put into pie pan.
In a large bowl, combine the flour, sugar, salt, and 1 teaspoon cinnamon.
Add the peeled and sliced pears.
Mix to combine and add them to the lined pie pan.
Dot with the 1 Tablespoon butter.
Sprinkle with the lemon juice.
Set aside.
In another bowl,Mix the 1 cup flour, brown sugar,1/4 teaspoon cinnamon, and the nutmeg.
Cut in the 7 Tablespoons butter until the mixture is crumbly.
Stir in the nuts if you are using.
Sprinkle this over the top of the pears.
Bake at 450 degrees for 10 minutes. Lower the temperature to 350 degrees and bake for another 35-40 minutes until the pears are tender.
Serves 6-8.
Yummy!
 This is a simple shortening pie crust. I make this one a lot. It is great when you don't have a lot of time to devote to make a crust made with butter.
You can make it and roll it out in about 5-10 minutes.
Another reason I make it a lot is that my daughter prefers this crust to a butter crust.
This recipe is for a 9" single crust pie shell.
If you need a double crust or a lattice crust, just double the recipe.
Ingredients:
1 cup flour
1 teaspoon salt
1/3 cup solid shortening
2-3 Tablespoons cold water
With a fork, mix the flour and salt in a bowl.
Add the shortening and work it in with the fork or your hands.
The mixture should be somewhat crumbly.
The shortening should be worked through well and most of the it should be in tiny pieces, but leave a few a little bigger.
Add the water a tablespoon at a time and work it in with the fork.
The dough should just start coming together.
With your hands work the dough just until all the flour is incorporated and you can pat it into a ball.
Flatten and let rest while you flour a counter for rolling the crust out.
Roll out the dough until it is a little larger than the size of your pie pan. To test it, take your pie pan and turn it upside down over the dough.
If you have plenty of room around the pan, it is big enough.
Now carefully, roll the roll up- loosely- and transfer to the pie pan.
Trim the dough away from the edge of the pan. But leave about an inch overhang.
Fold the crust over around the edge and crimp to seal.
Make sure to leave a bit of an edge along the top of the pan.
 I love croutons on my salad. But, I never thought about buying them. One day, I just thought, I should make my own.
They are easy to make and don't take long at all.
You probably have everything you need to make some croutons right now in your kitchen.
Preheat your oven to 375 degrees Fahrenheit.
You will need a baking sheet.
Ingredients:
2 slices bread, any kind you want
butter
garlic powder
Parmesan cheese
Parsley flakes
Or try your own combination of seasonings.
Butter both sides of both slices of bread.
Sprinkle well with the garlic powder, Parmesan cheese and parsley flakes.
Stack the bread and with a knife, cube the bread and spread the pieces out on a baking sheet.
Bake for 15-20 minutes until golden and crunchy.
Stir the cubes every 5 minutes.
At 15 minutes, check for crunchiness.
If not quite done, check again in just a few minutes.
Do not let them over brown or they will not taste very good.
You will get approximately 1-1/4 cups of croutons.
To store- put in an air tight container or a baggie.
 Who says you have to go out to eat to enjoy a taco pizza? You can make really great taco pizza at home. It's hot and fresh and oh so yummy.
Preheat your oven to 425 degrees Fahrenheit.
You will need a 11"x 15" greased pan.
Ingredients:
Pizza crust dough either homemade or buy a mix or premade.
3/4 cup refried beans
1 cup pizza sauce
1/2 lb cooked and crumbled ground beef, seasoned like taco meat
2 cups shredded mozzarella cheese
1 cup cheddar cheese or cheddar/jack cheese, divided
2-1/2 to 3 cups chopped lettuce
1 medium ripe chopped tomato
handful of nacho cheese corn chips, crumbled
other optional toppings include:
chopped onion
sliced black olives
Pat the pizza crust dough into the pan.
Spread the refried beans over the crust.
Spread the pizza sauce over the beans.
Add the seasoned ground beef and the mozzarella cheese.
Sprinkle with about half the cheddar cheese.
Bake in the preheated oven for 20-25 minutes until the cheese is all melty and starting to brown.
Remove from oven and cut into serving sizes but leave in pan.
Put the lettuce on the pizza.
Add the tomato, some more cheddar cheese, and the nacho cheese chips.
Add other toppings if you like.
Serve with taco sauce and maybe some sour cream.
If you'd like to try a chicken taco pizza, use 2 cups seasoned, cubed chicken breast instead of the ground beef.
 Great homemade pizza starts with a great crust. What I really love about this recipe is that it is the same for making thin crust, pan pizza, or even calzones.
If you want a crispier crust, prebake it. If you want a softer crust, add the toppings and than bake.
For thin crust preheat your oven to 425 degrees Fahrenheit.
For pan pizzas and calzones your oven is set to 375 degrees Fahrenheit.
For tossed style crust preheat to 425 degrees Fahrenheit.
Pan sizes:
Grease whatever pans you are using.
Pan pizzas- two 11"x7", two 9" square, or two 9" round
Thin crust- two 12" pizza pans or baking sheets
Calzones- baking sheets
A tossed style crust like you'd get at a pizza place-11"x15"
Ingredients:
2-3/4 to 3-1/4 cups flour
1 package dry yeast
1/4 teaspoon salt
1 cup warm water
2 Tablespoons olive oil or any cooking oil
In a large bowl, combine 1-1/4 cups flour, yeast, and salt.
Add the water and the oil.
Beat well by hand or a mixer until everything is incorporated well.
Gradually add most of the rest of the flour and stir it in.
Turn the dough out onto floured counter and knead and work in enough flour to make the dough smooth and elastic.
If you are making the tossed style, leave it in one piece. Otherwise divide it in two.
Let the dough rest for ten minutes, covered.
For the pan pizzas, pat the dough into the pans and halfway up the sides.
Cover and let rise til double about 45 minutes.
For a crispier crust, bake in a preheated 375 degree oven for 20-25 minutes . Add the toppings and bake an additional 15-20 minutes or until bubbly.
For a softer crust don't bake the first time. Just add the toppings after it rises and bake for 15-20 minutes.
For the thin crust, add some cornmeal to the greased pans if you want.
Roll each portion into a 13" circle and transfer to pans. Build up the edges slightly.
For a crispier crust, put into a 425 degree oven for about 12 minutes until brown.
Add the toppings.
Bake for another 10-15 minutes until bubbly.
For a softer crust do not prebake before adding the toppings.
For calzones, roll each portion into 13" circles and transfer to baking sheets.
Add toppings to half of each crust. Moisten the edges and fold over to seal.
Prick tops of crust with a fork.
Brush tops with milk.
Bake in 375 degree oven for 30-35 minutes til crusts are brown.
For tossed style crust, press the dough into the pan. Add the toppings and bake in a 425 degree oven for 15-20 minutes til bubbly.
 This is homemade chocolate ice cream that is so chocolaty, that it would be hard to find one that is quite so rich.
So, if you like an ice cream that slaps you in the mouth and says "Chocolate!" than this is for you.
This is Philadelphia- style ice cream. Meaning it is entirely cream based. It has no eggs in it.
You will need an ice cream freezer for this.
Ingredients:
1 quart heavy whipping cream
1 cup sugar
8 oz semi-sweet chocolate, chopped or grated
2/3 cup cocoa powder, preferably Dutch processed
In a 3 quart saucepan heat the cream to boiling.
When it has reached the boiling point, turn the heat down to low.
Add the sugar, chocolate, and cocoa powder.
Stir constantly until everything is blended together and smooth.
Remove from the heat and transfer to a bowl.
Refrigerate for a few hours.
Pour into your ice cream freezer and freeze according to the directions.
Makes 1 quart of rich chocolate ice cream.
I love eating mine sprinkled with cashews.
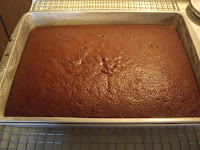 This cake is awesome. It is very moist. I love to serve this frosted with sour cream chocolate frosting
.
This cake is so simple to put together. Just put everything in a bowl and beat it up.
You will need 2( 8" or 9") round cake pans or 1 (13"x9") cake pan, greased and floured.
Preheat your oven to 350 degrees Fahrenheit.
Ingredients:
2 cups flour
2 cups sugar
3/4 cup sour cream
1/2 cup shortening
1 cup water
1-1/4 teaspoons baking soda
1 teaspoon salt
1 teaspoon vanilla extract
1/2 teaspoon baking powder
2 eggs
3/4 cup unsweetened cocoa powder
Put everything into a mixing bowl and beat, with a mixer, on low speed for one minute.
Scrape down the sides.
Beat on high speed for three minutes.
Pour the batter into the pan or pans.
Bake for 40-45 minutes until cake tests done when checked with a toothpick.
Cool and frost.

I make this frosting to go on my sour cream chocolate cake. I recommend you use a mixer to beat the frosting. You can do it by hand. However, using a mixer causes the frosting to be lighter and fluffier than it will if done by hand.
Ingredients:
8-1/3 Tablespoons butter, softened
9 Tablespoons unsweetened cocoa powder
3 cups powdered sugar
1/2 cup sour cream
2 teaspoons vanilla extract
Mix the butter and the cocoa powder.
Add the powdered sugar and stir in.
Stir in the sour cream and vanilla extract.
With a mixer, beat everything until it is smooth and spreadable.
This will frost a 13"x9" cake or will frost and fill a 8" or 9" double layer cake.
 Oh, I love this stuff. The picture shows the cheese in it's melting phase, just out of the oven.
Preheat your oven to 375 degrees Fahrenheit.
You need a greased 9" square pan, either with a cover or foil for covering.
Ingredients:
1 pound fresh or frozen broccoli- You may want to partially cook it so when finished the broccoli in the dish isn't too crunchy.
4 boneless, skinless chicken breast halves
2 Tablespoons cooking oil
1/2 teaspoon salt
1/4 teaspoon pepper
1 (10-3/4oz) can condensed cream of chicken soup
1/2 cup mayonnaise
1/2 teaspoon curry powder
1 teaspoon lemon juice
1 cup shredded cheddar cheese
Place the partially cooked broccoli in the greased baking pan.
In a skillet, brown the chicken breasts in the oil.
Season both sides of the chicken with salt and pepper and lay over the broccoli.
Set aside.
In a bowl; mix the soup,mayonnaise, lemon juice, and curry powder.
Pour over the chicken.
Cover and bake for 40 minutes until the chicken is tender and cooked through.
Sprinkle with the cheese.
Let stand for 5 minutes before serving.
Serves 4.
If you like asparagus, try making it with that as well.
 These are not just any refried beans. One taste and you won't want store bought anymore.
Most refried beans are some mashed beans and some whole beans. This version is all smooth beans.
These are very authentically Mexican. Thanks to Rick Bayless for showing me how tasty refried beans can be.
This recipe calls for bacon grease or lard.
This gives the best flavor, but you can use a vegetable oil to cut out the cholesterol.
You will need a food processor or blender.
You will also need a large skillet.
Ingredients:
4 cups undrained, cooked beans-whatever variety you want to try, Pinto is what I mostly use. Use canned or homemade, slightly warm.
1/2 cup lard, bacon grease, chorizo drippings, or vegetable oil
1 medium white onion, chopped
4 garlic cloves, peeled and finely chopped
salt-to taste
Put the beans with some of the liquid into the container of a blender or food processor.
Heat the bacon grease in the skillet.
Add the onion and cook until it is golden, stirring frequently so it doesn't burn.
Stir in the garlic and cook for about a minute.
With a slotted spoon scoop the onion and garlic in with the beans.
Puree the beans until smooth.
Keep the grease hot and add the puree.
Cook over medium low heat for about 20 minutes or til the beans are as thick as you want them. Stir frequently.
Taste test and add salt, if needed.
The beans should be quite thick and seem to have a soft mashed potato like consistency.
Remove from heat and serve.
Great by itself with maybe some cheese sprinkled on top.
You can also serve with chips or as an ingredient in another dish.
Serves 6 large portions or 3-1/2 cups
Super yummy!
 What could be better on a cool day than a bowl of chili? For chili lovers, not much.
I used to always make chili using store bought chili beans.
But, I would buy dry beans for this recipe or that and I had a lot of them so I decided to try using them in my chili.
And I am glad I did. Yummy!!!!
You will need a 3 quart or larger pan.
Ingredients:
1/2 pound dry black beans, you can also use 2 (15oz)cans black beans
1 medium onion
1 chili pepper
1 pound ground turkey
1(15oz) can chopped tomatoes
salt
pepper
chili powder
chipotle powder
1 potato chopped- optional
If using the dry beans, soak them out and cook.
When the beans are about halfway done, season with salt, pepper and about a 1/2 teaspoon chipotle powder and 1/2 teaspoon chili powder.
Add some of the onion.
If using the canned beans, add the seasonings and onion to them and simmer together for 10-15 minutes.
Do not drain the beans.
Meanwhile, cook the ground turkey with the remaining onion and chili pepper. Season with salt, pepper, and chili powder.
Drain the meat and add to the beans.
Add the chopped tomatoes.
Add the chopped potato now, if using.
Season with the salt and pepper to taste.
Add 1-2 teaspoons chili powder.
Add 1 teaspoon chipotle powder.
Taste and add more if you like.
Turn the heat to medium-high and bring to a boil.
Turn down the heat and put the cover on.
Stir occasionally.
Cook on low for 2 hours or until the chili is as thick as you would like.
Serves 4-5.
Serve with sour cream and shredded cheddar cheese and maybe some crackers.
 Making your own applesauce is a cinch. If you are lucky enough to have your own apple tree or have someone give you some, you really should try making it yourself.
If you have enough, you can can it or even freeze it. Or just make small amounts and store it in the refrigerator.
You will need a dutch oven or large saucepan.
If you are making a large batch get some canning jars and flats with rings or freezer containers ready.
If canning, get out your water bath canner or pressure canner.
You will also need a food processor, hand held blender, or potato masher.
Ingredients:
Apples- 3 pounds will make just over 1 quart of sauce
water or bottled apple juice-1 to 2 cups, depending on how many apples you have
Sugar to taste- optional
Peel, core, and chop the apples.
Put in the cooking pan.
Add enough water or juice to the apples so that the apples won't burn.
Cover the pan and turn on the heat.
Stir frequently.
When the liquid and apples come to a boil, turn down the heat and let simmer for about 45 minutes to an hour.
The apples will be very soft.
Stir frequently.
Now, you can get out your potato masher and mash them into sauce by hand. If the apples are soft enough, this is very simple.
You can also use a hand held blender or puree them in a food processor.
When all the apples are sauced, put them back into the pan.
Now, taste them and add some sugar to your liking. Just add a few tablespoons at a time and cook the sugar in.
Taste and if needed add a little more sugar.
When it is as sweet as you want, bring back to a simmer and cook to desired consistency.
Remove from heat and put in jar to can, freezer containers to freeze, or store in the refrigerator.
If canning, process in a water bath canner for 20 minutes- both for pints and quarts.
You can also pressure can it for 15 minutes under 5 pounds pressure.
Obviously, the tasting herbs are fresh.
But, what happens when you don't have fresh herbs?
And how much should you use?
Some recipes call for fresh herbs, but many of us don't normally have them sitting around the house.
So, you have two options.
You either use frozen or dried.
After the fresh, frozen has more flavor than dried.
But, dried is easier.
Frozen herbs are best put into recipes that are to be cooked.
If you want to freeze you herbs, wash and dry them.
Next you can put them whole into bags and lay them flat in the freezer.
When you want some, just open the bag and take some out.
When they thaw they will be wet and hard to cut. And they will be limp, of course.
So, I just like to snip them with scissors.
Another way to freeze them is to wash, dry, and chop them. Than you put some in a ice cube tray. Add some water to fill and freeze.
When frozen pop them out and store in a freezer bag.
When you need them, just take a cube out and add it to the recipe.
Frozen amounts are pretty much equivalent to fresh.
Your next option is using dried herbs.
This is so easy.
You either dry your own herbs or just buy them from the store.
But, don't use the full amount of dried that you would fresh.
Use half the amount.
So, if it calls for 1 Tablespoon fresh, use 1/2 Tablespoon(1-1/2 teaspoon) dried.
But, if the recipe calls for leaves and you just have ground, use 1/3. That would be 1 teaspoon for every tablespoon that the recipe calls for.
 This quick bread is chock full of blueberries. It is also a very moist bread.
Not flavors you normally think of together. However, it works well.
Tastes great with fresh or frozen blueberries and zucchini.
You will need two 9"x5" greased loaf pans.
Preheat your oven to 350 degrees Fahrenheit.
Ingredients:
1 cup cooking oil
3 eggs
1 Tablespoon vanilla extract
2-1/4 cups sugar
2 cups shredded zucchini
3 cups flour
1 teaspoon salt
1 teaspoon baking powder
1/4 teaspoon baking soda
1 Tablespoon ground cinnamon
3-1/2 to 4 cups blueberries
In a large bowl, beat together the oil, eggs, vanilla extract, and sugar.
Mix in the zucchini.
Stir in the flour, salt, baking soda, baking powder, and cinnamon.
Fold in the blueberries.
Divide the batter evenly between the two loaf pans.
Bake for an hour until the bread tests done by inserting a toothpick in the middle.
Let the breads rest for 30 minutes in the pans before loosening and turning out. If you take it out too soon, the bread will fall apart.
Let cool on a wire rack.
Makes 2 loaves.
 Scalloped ham and potatoes is great comfort food. It is so perfect when the weather starts cooling down.
It is hearty and warms you up from the inside.
You will need a 2 quart casserole with a lid.
Preheat your oven to 375 degrees Fahrenheit.
Ingredients:
5-6 medium sized potatoes
1 to 1-1/2 cups cubed ham
1/4 cups flour
2 Tablespoons butter
1 cup milk
salt
pepper
Peel and slice the potatoes.
Arrange the potato slices and ham cubes in the casserole dish so that they are distributed evenly.
Sprinkle the flour over the top of the potatoes and ham.
Cut the butter into cubes and put over the flour.
Pour the milk over all.
Sprinkle it all with salt and pepper.
Cover the casserole and bake in the preheated over for about an hour.
After 50 minutes, stir the ham and potatoes and check to see if the potatoes are done.
If it seems dry add a bit more milk.
Cover and put back into oven if needed.
Check in another 10-15 minutes.
When potatoes can be pierced with a knife or fork easily, the dish is done.
Serves 4-6.
 This is my recipe for canned salsa. I make fresh salsa as along as I have tomatoes and peppers growing in the garden. But, when winter comes I need salsa in my pantry.
Ready 6 pint jars for canning. You can also get pint size freezer containers instead.
This is my recipe for canned salsa. I make fresh salsa as along as I have tomatoes and peppers growing in the garden. But, when winter comes I need salsa in my pantry.
Ready 6 pint jars for canning. You can also get pint size freezer containers instead.
You will also need a water bath canner for canning.
Ingredients:
20 medium size tomatoes- or enough to get 14 cups, chopped
3-1/3 cups seeded and chopped peppers - a mix of jalapeno and bell or Anaheim
2 cups coarsely chopped onions
1/2 cup chopped fresh cilantro or parsley- you can also use 1/4 cup dried
1/2 cup vinegar
5 cloves garlic, chopped finely
1 Tablespoon sugar
1 teaspoon salt
1 teaspoon pepper
Peel and seed the tomatoes. Chop and place in a colander to drain for 30 minutes to an hour.
Place the tomatoes in a dutch oven, probably about 5 quart size.
Bring to a boil and reduce heat.
Simmer, uncovered about an hour til thick and chunky. Stir frequently.
The juicier the tomatoes, the longer it will take to thicken up.
While, the tomatoes are cooking down, chop the onions, peppers, cilantro, and garlic.
Put that into a large bowl and add the vinegar, sugar, salt, and pepper.
When the tomatoes are ready add the pepper mixture.
Return mixture to boiling.
Remove from heat and ladle into the prepared jars.
Seal.
Process in the water bath canner for 35 minutes.
If you prefer, ladle the salsa into freezer containers and freeze for up to a year.
You will get 5 or 6 pints.
If you want mild, use 3 cups bell or Anaheim and 1/3 cup jalapeno.
If you want medium, use half one kind and half the other.
If you want hot, use 3 cups jalapeno and 1/3 cup Anaheim.
Serranos are also good in this salsa.
 Peeling tomatoes is a pretty simple process.
First, you need a large pan full of water.
Bring it to a boil.
While the water comes to a boil, get your tomatoes ready.
Wash them and cut out the core and the blossom end.
With a knife, slash an X in the top and bottom of each tomato.
Doing this will help the skin come away from the flesh of the tomato.
Run some cold water into a large basin or sink.
When the water is boiling, lower 3 or 4 tomatoes into it.
Leave in for 1 minutes.
Quickly remove and put into the cold water.
The cold water will stop the tomatoes from cooking.
Repeat with the remaining tomatoes.
Many of the tomatoes will have skin that looks like it is already peeling away and that is good.
After letting the tomatoes cool for a few minutes, you can start peeling the tomatoes.
With a knife, peel the loosened skin away from the tomato.
That is all there is to it.

 If you have never had a homemade pot pie, you are in for a treat. It is comfort food that warms you up on a cold day.